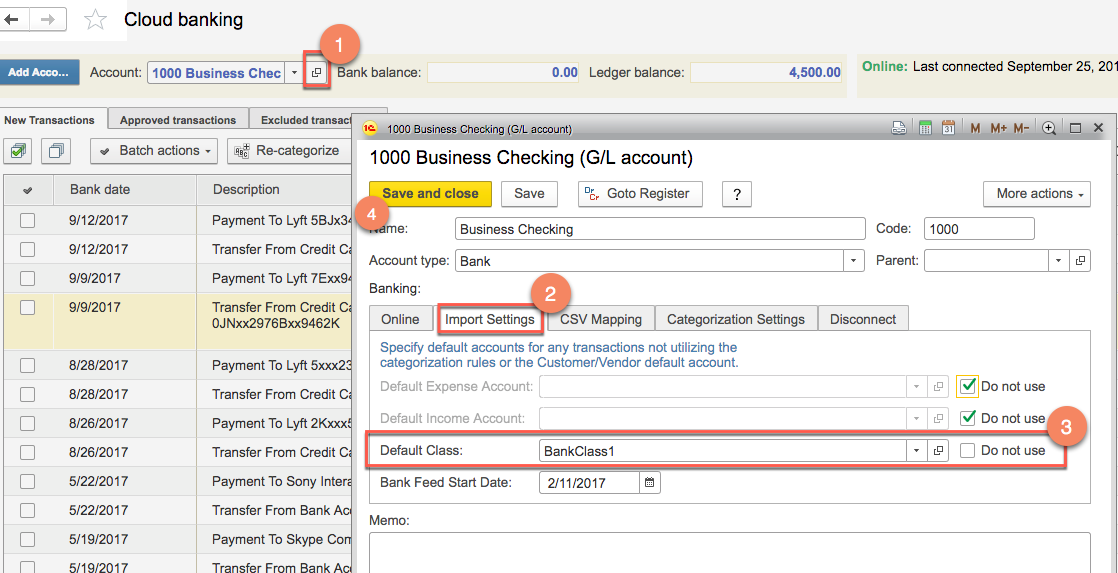
[Cloud Banking] Assign classes to different bank accounts
In order to assign default classes to each bank account, Navigate to Bank/Cloud Banking and take following steps:
1. Open the bank account card (G/L account card)
2. Select "Import Settings" tab
3. Uncheck the box for "Default Class" field and select the class to be assigned to that bank
4. Click "Save and Close"
Related Articles
Getting Started - Connecting your bank accounts to Cloud Banking
Getting Started with Cloud Banking Cloud Banking simplifies financial management by connecting to over 15,000 banks and credit card companies, automatically syncing transactions to reduce data entry and providing a comprehensive view of your ...Getting Started with Cloud Banking
Getting Started with Cloud Banking AccountingSuite™ connects you to thousands of banks and credit card companies in the cloud eliminating the time-consuming task of entering transactions manually. Click to accept a transaction rather than entering it ...Cloud Banking Home Page Tab
The Cloud Banking Dashboard gives you a summary of what's happening with your bank accounts. On the left you will see a graph that shows cash flow data (deposits and payments) for each month. On the right is a list of bank accounts that will ...Banking
Banking Record checks and deposits, reconcile bank statements and use cloud banking to minimize data entry. Our banking module is helps you keep to the penny. To get started, navigate over to Cloud Banking and set up your bank and credit card ...How to split a transaction in Cloud Banking
1. Approve the desired transaction in cloud banking 2. Open the document generated by the approval (can be found from the "approved" tab) 3. Add the G/L accounts with the desired split amounts at the bottom of the document. Note the split totals must ...